Windows 11 can print photos and PDFs, but it does not always make poster tiling obvious. If you open a picture and press Print, the app may shrink it to one sheet, crop it unexpectedly, or hide the scaling controls you need.
The reliable workflow is to create a tiled PDF first. Each PDF page becomes one physical sheet, and Windows only has to print those pages at the correct scale.
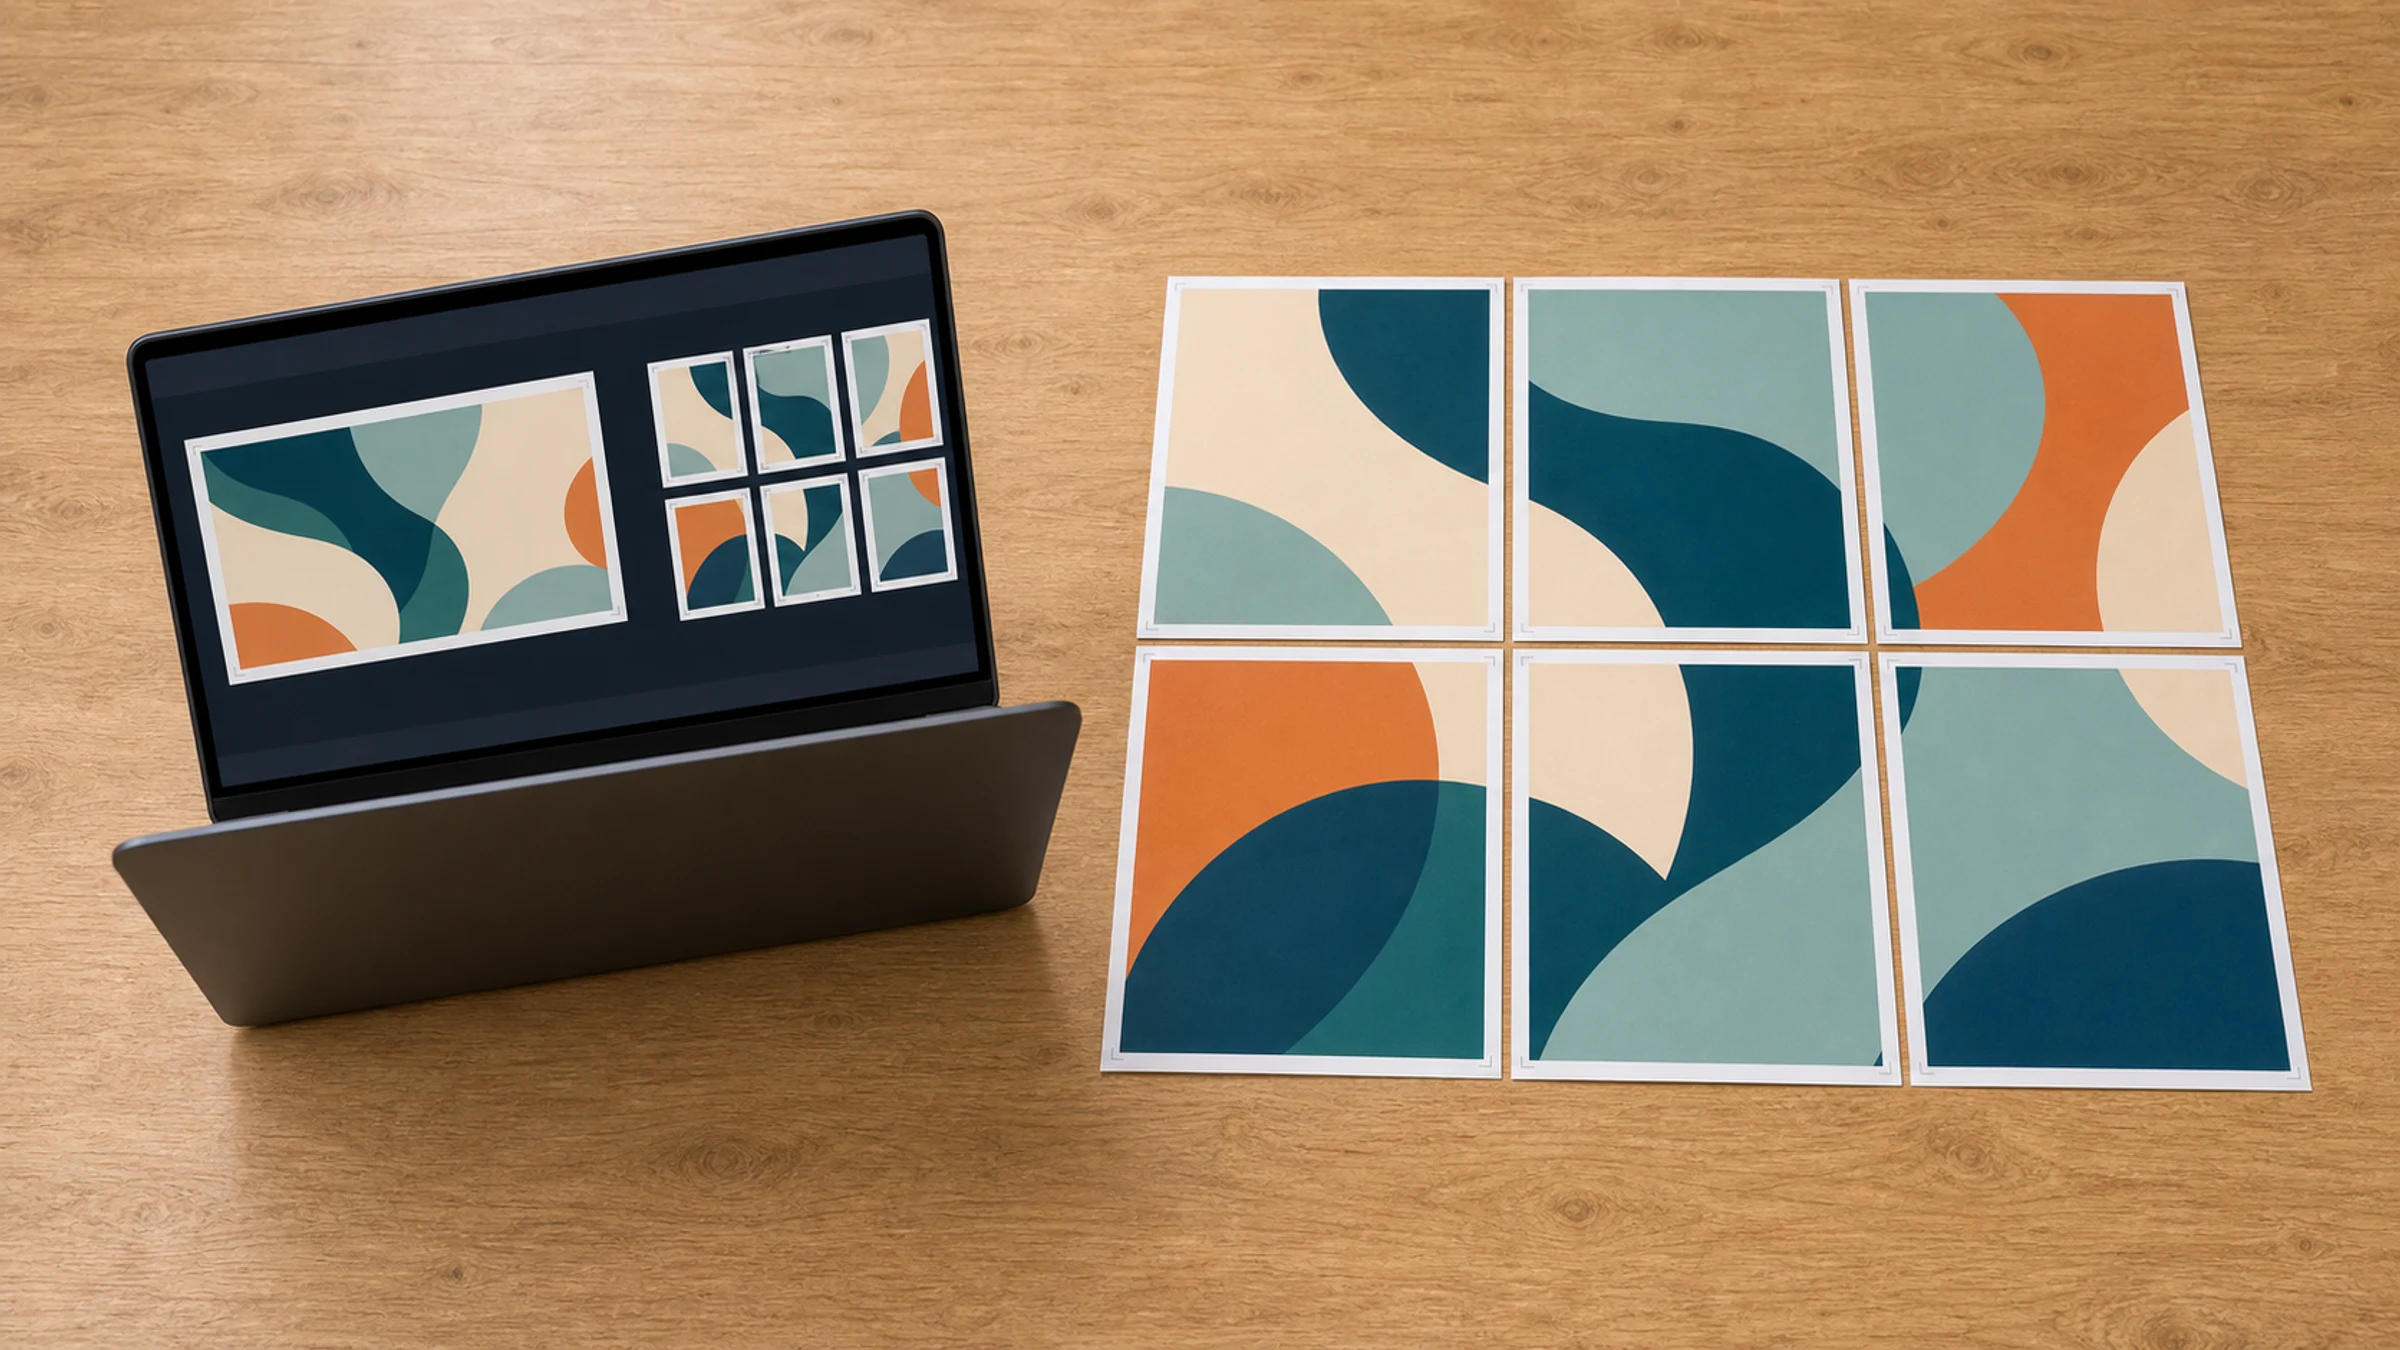
Rasterbator.pics prepares the poster locally in your browser. Your picture is processed on your device while the tiled PDF is generated.
The safest Windows 11 workflow

Use this order:
Choose a high-resolution picture.
Create a tiled PDF from that picture.
Open the PDF in a viewer with clear scaling controls.
Print the PDF at Actual Size, 100%, or No scaling.
Print one test page before printing the full poster.
Trim and assemble the pages.
This separates two jobs that are easy to confuse. Rasterbator.pics handles the tiling. Windows handles printing the finished pages.
Why the normal Windows print flow can go wrong
Windows 11 may print from several places:
Photos
Paint
Microsoft Edge
Adobe Acrobat Reader
Your printer manufacturer's app
The classic Windows print dialog
Each one can use different wording for scale. You may see Fit to page, Fill, Shrink oversized pages, Actual size, Poster, Tile scale, or a percentage box.
For ordinary photos, this does not matter much. For a tiled poster, it matters a lot. If the tiled PDF is correct but Windows prints it at 94%, every page becomes slightly too small and the seams stop lining up.
Choose paper size before poster size
Start with the sheet size your printer actually uses.
| Paper size | Dimensions | Common use |
|---|---|---|
| A4 | 210 x 297 mm | Home and school printers in many countries |
| Letter | 8.5 x 11 in | Home and office printers in the United States and Canada |
| A3 | 297 x 420 mm | Office printers and copy shops |
Most printers also leave an unprintable edge of about 3-5 mm. Even when a PDF page is A4, the inkable area is a little smaller. Plan for overlap, trimming, or visible white seams.
Approximate final sizes:
| Grid | A4 final size | Letter final size | Notes |
|---|---|---|---|
| 2 x 2 | 420 x 594 mm | 17 x 22 in | Simple small poster |
| 2 x 3 | 420 x 891 mm | 17 x 33 in | Tall wall print |
| 3 x 3 | 630 x 891 mm | 25.5 x 33 in | Good home poster size |
| 4 x 4 | 840 x 1188 mm | 34 x 44 in | Needs careful assembly |
These are paper-grid estimates. Overlap, trimming, and printer margins can change the finished size.
Step 1: Prepare the picture
Use the largest clean version of the image you have. Good sources include original camera photos, exported design files, large PNG files, and high-resolution JPEG files.
Avoid tiny thumbnails, compressed chat previews, and screenshots unless the final poster is meant to be rough or viewed from far away.
Before tiling, check:
The image is not sideways.
Important details are not too close to the edge.
Text is large enough to read at the final size.
The picture has enough contrast for your printer.
The file opens normally on Windows 11.
If the image is rotated, fix that in Photos or another editor first. Save the corrected file before creating the tiled PDF.
Step 2: Create the tiled PDF
Open Rasterbator.pics and load the picture.
Choose:
Paper size: A4, Letter, or the exact sheet loaded in your printer
Page orientation: portrait or landscape
Poster size: by pages, width, or height
Overlap: usually 5-10 mm if you want easier alignment
Crop marks: on when you plan to trim
Page numbers: on for medium and large posters
Download the generated PDF. The PDF should contain one page per sheet.
Step 3: Open the PDF in Windows 11
Open the PDF in a viewer with clear print controls. Adobe Acrobat Reader is often useful because its scale options are explicit. Microsoft Edge can also work, but check its print preview carefully.
If your PDF is already tiled by Rasterbator.pics, you usually do not need Acrobat Reader's Poster feature. Print the existing PDF pages at the correct scale instead.
Step 4: Print at 100%
This is the most important setting.
Use:
Actual Size
100%
No scaling
Avoid:
Fit
Fit to page
Shrink to printable area
Scale to fit
Fill entire paper
If the preview shows clipped edges, do not fix it by using Fit unless you accept a smaller poster. Regenerate the PDF with safer margins or more overlap.
Step 5: Print one test page
Before printing 9, 16, or 25 sheets, print one page.
Check:
The orientation is correct.
The page is not scaled down.
Important content is not cut off.
The image quality is acceptable.
A ruler measurement matches your expected size if scale matters.
If the test page is wrong, stop. Fix the setting and print another test page.
Step 6: Print all pages and keep them in order
When the test page works:
Load the correct paper.
Confirm the paper size in the print dialog.
Confirm Actual Size or 100% again.
Print all pages.
Keep the output stack in order.
Some printers reverse page order or output face down. Sort the pages before trimming.
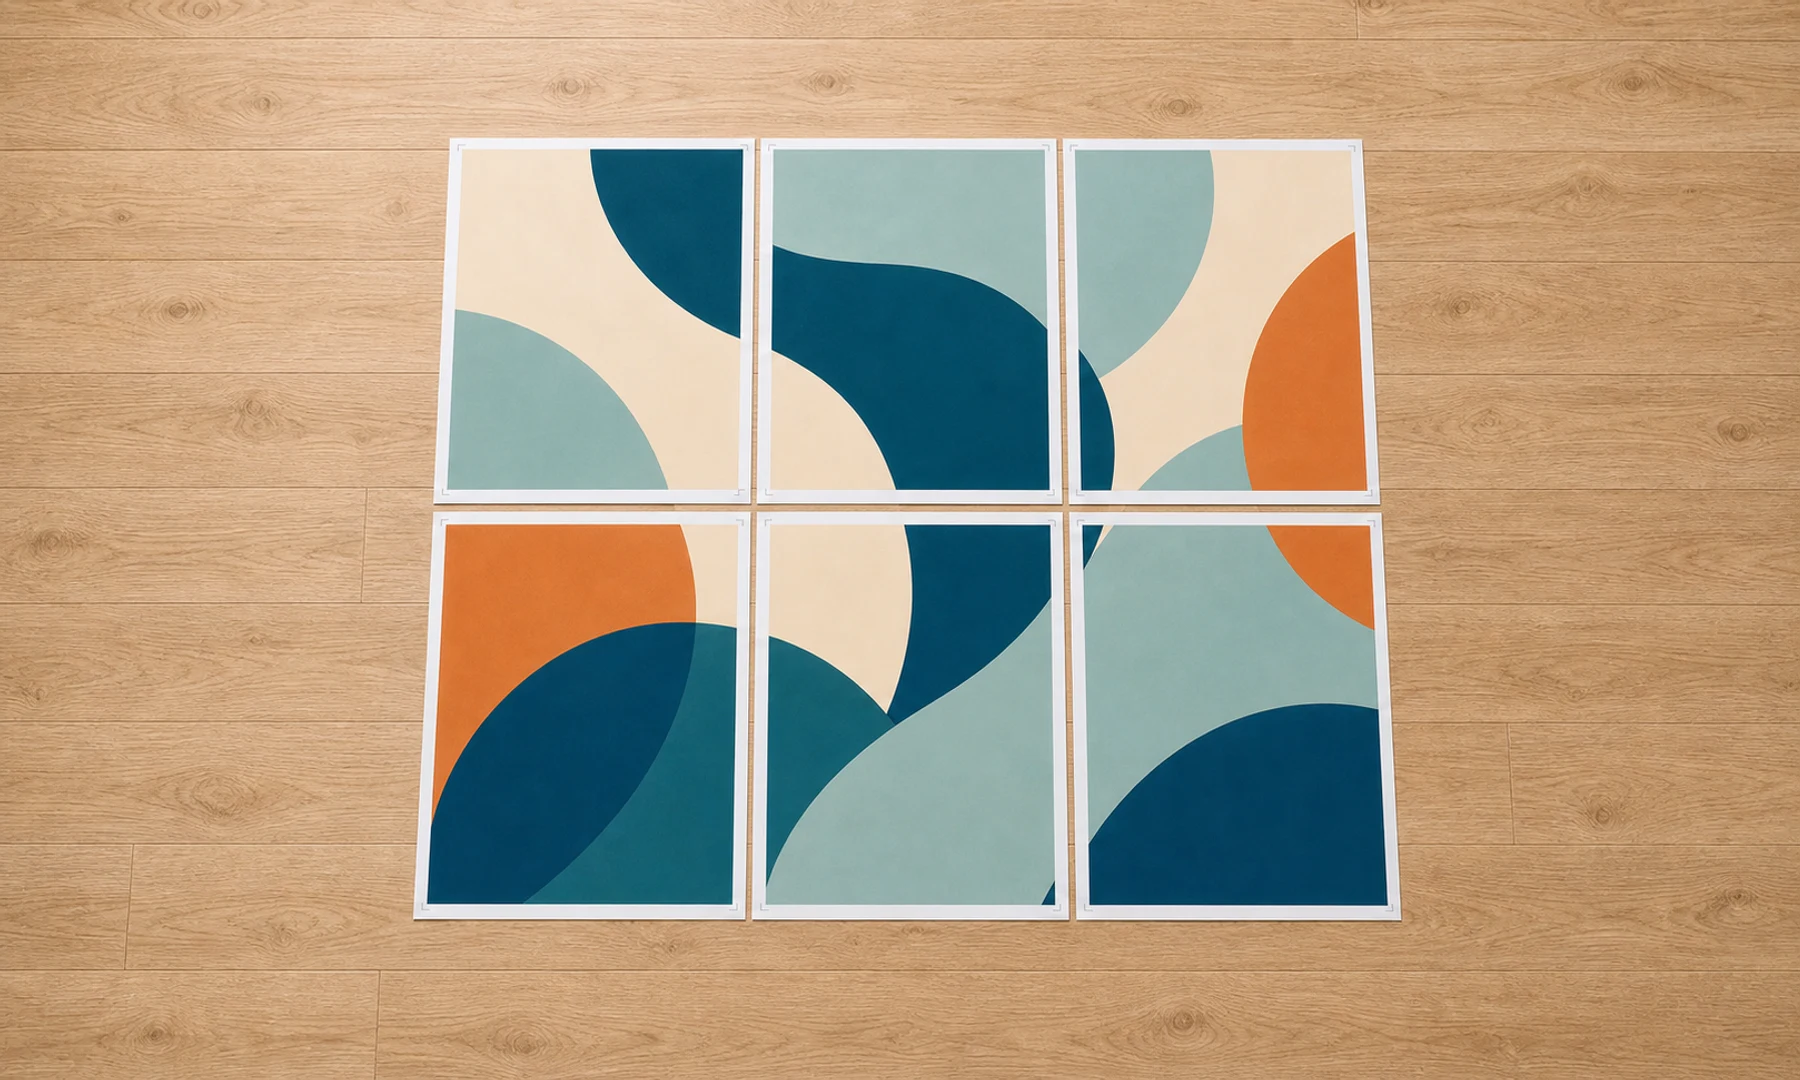
Step 7: Trim and assemble
You will need:
Ruler
Craft knife, scissors, or paper trimmer
Cutting mat or spare cardboard
Glue stick
Clear tape or masking tape for the back
Large table or clean floor
Lay out every page before gluing. Check rows and columns first, then trim only the edges needed for overlap or clean seams. A glue stick usually wrinkles paper less than liquid glue. Back-side tape adds strength without making the front shiny.
Checklist before you hit Print
The picture is high enough resolution for the poster size.
The tiled PDF was generated for the paper you will actually use.
The PDF is opened in a viewer with clear scale controls.
Scaling is set to Actual Size, 100%, or No scaling.
Fit, Fill, and Shrink options are off.
One test page has been printed.
You know your printer may leave 3-5 mm unprintable margins.
You have a trimming and assembly plan.
You have glue stick and back-side tape ready.
When Acrobat Reader Poster mode is useful
Adobe Acrobat Reader's Poster mode can split one large PDF page across many sheets. It is useful when you already have a large single-page PDF.
For a normal image file, a dedicated tiled PDF is usually simpler:
| Method | Best use | Main caution |
|---|---|---|
| Rasterbator.pics tiled PDF | Turning an image into printable poster pages | Print the result at 100% |
| Acrobat Reader Poster mode | Splitting one large PDF page | Check tile scale and overlap |
| Windows Photos | Printing one image on one sheet | Not reliable for poster tiling |
| Paint | Basic image printing | Scale control can be limited |
The rule is the same in every path: generate or choose the tiling layout first, then print without extra scaling.
FAQ
Can Windows 11 print one picture across several pages by itself?
Some Windows apps can print images, but poster tiling is inconsistent. The safer method is to create a tiled PDF first, then print that PDF at Actual Size or 100%.
Should I use A4 or Letter paper?
Use the paper that is physically loaded in your printer. Choose A4 for 210 x 297 mm sheets, or Letter for 8.5 x 11 inch sheets.
Why did my tiled poster print smaller than expected?
The print dialog probably used Fit, Shrink, or Scale to printable area. Regenerate or reopen the tiled PDF and print it at Actual Size, 100%, or No scaling.
Try Rasterbator.pics
Use Rasterbator.pics to test the article advice with your own image, page size, overlap, margins, and tiled PDF export.
Try Rasterbator.pics