You don't need a plotter to print a large PDF. If you only have a regular A4 printer, you can split the PDF into multiple A4 sheets, print them at actual size, trim the margins, and assemble the pages into one large poster, plan, chart, classroom display, or office sign.
This is called tiled printing, poster printing, or multi-page printing. The key is to preserve the correct scale and give yourself enough overlap so the pages are easy to align.
For a browser-based workflow, use Rasterbator.pics to prepare a tiled PDF:
Rasterbator.pics processes your image or PDF locally in your browser, so file preparation happens on your device rather than being uploaded for server-side processing.
When tiled PDF printing is useful
Printing a PDF across multiple A4 pages is useful when you need something larger than your printer can handle:
Office posters and temporary signage
Classroom wall materials
Event schedules and directional signs
Sewing patterns and craft templates
Technical diagrams and reference charts
Draft plans or layout checks
Large photos, maps, and visual boards
It's not the same as professional large-format printing. A tiled print will have visible joins, trimmed edges, and small alignment differences, but for many practical uses, it's inexpensive, fast, and good enough.
The basic idea
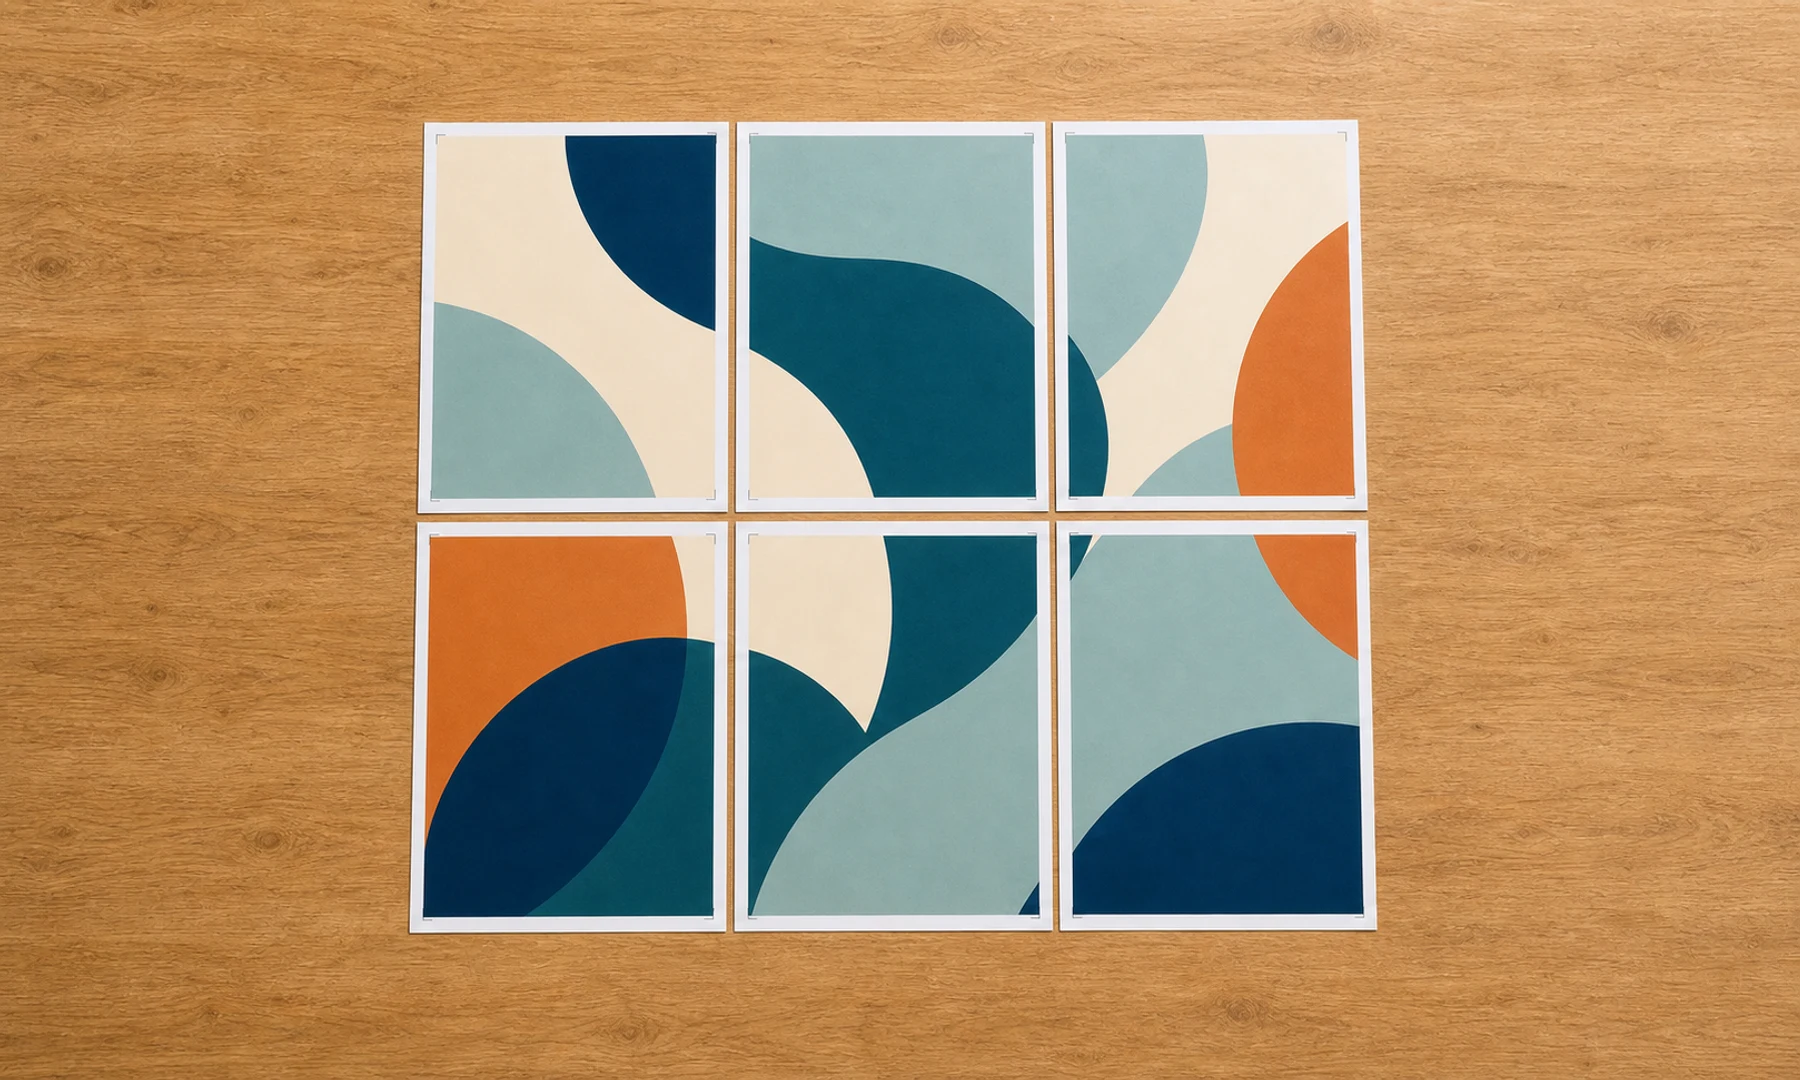
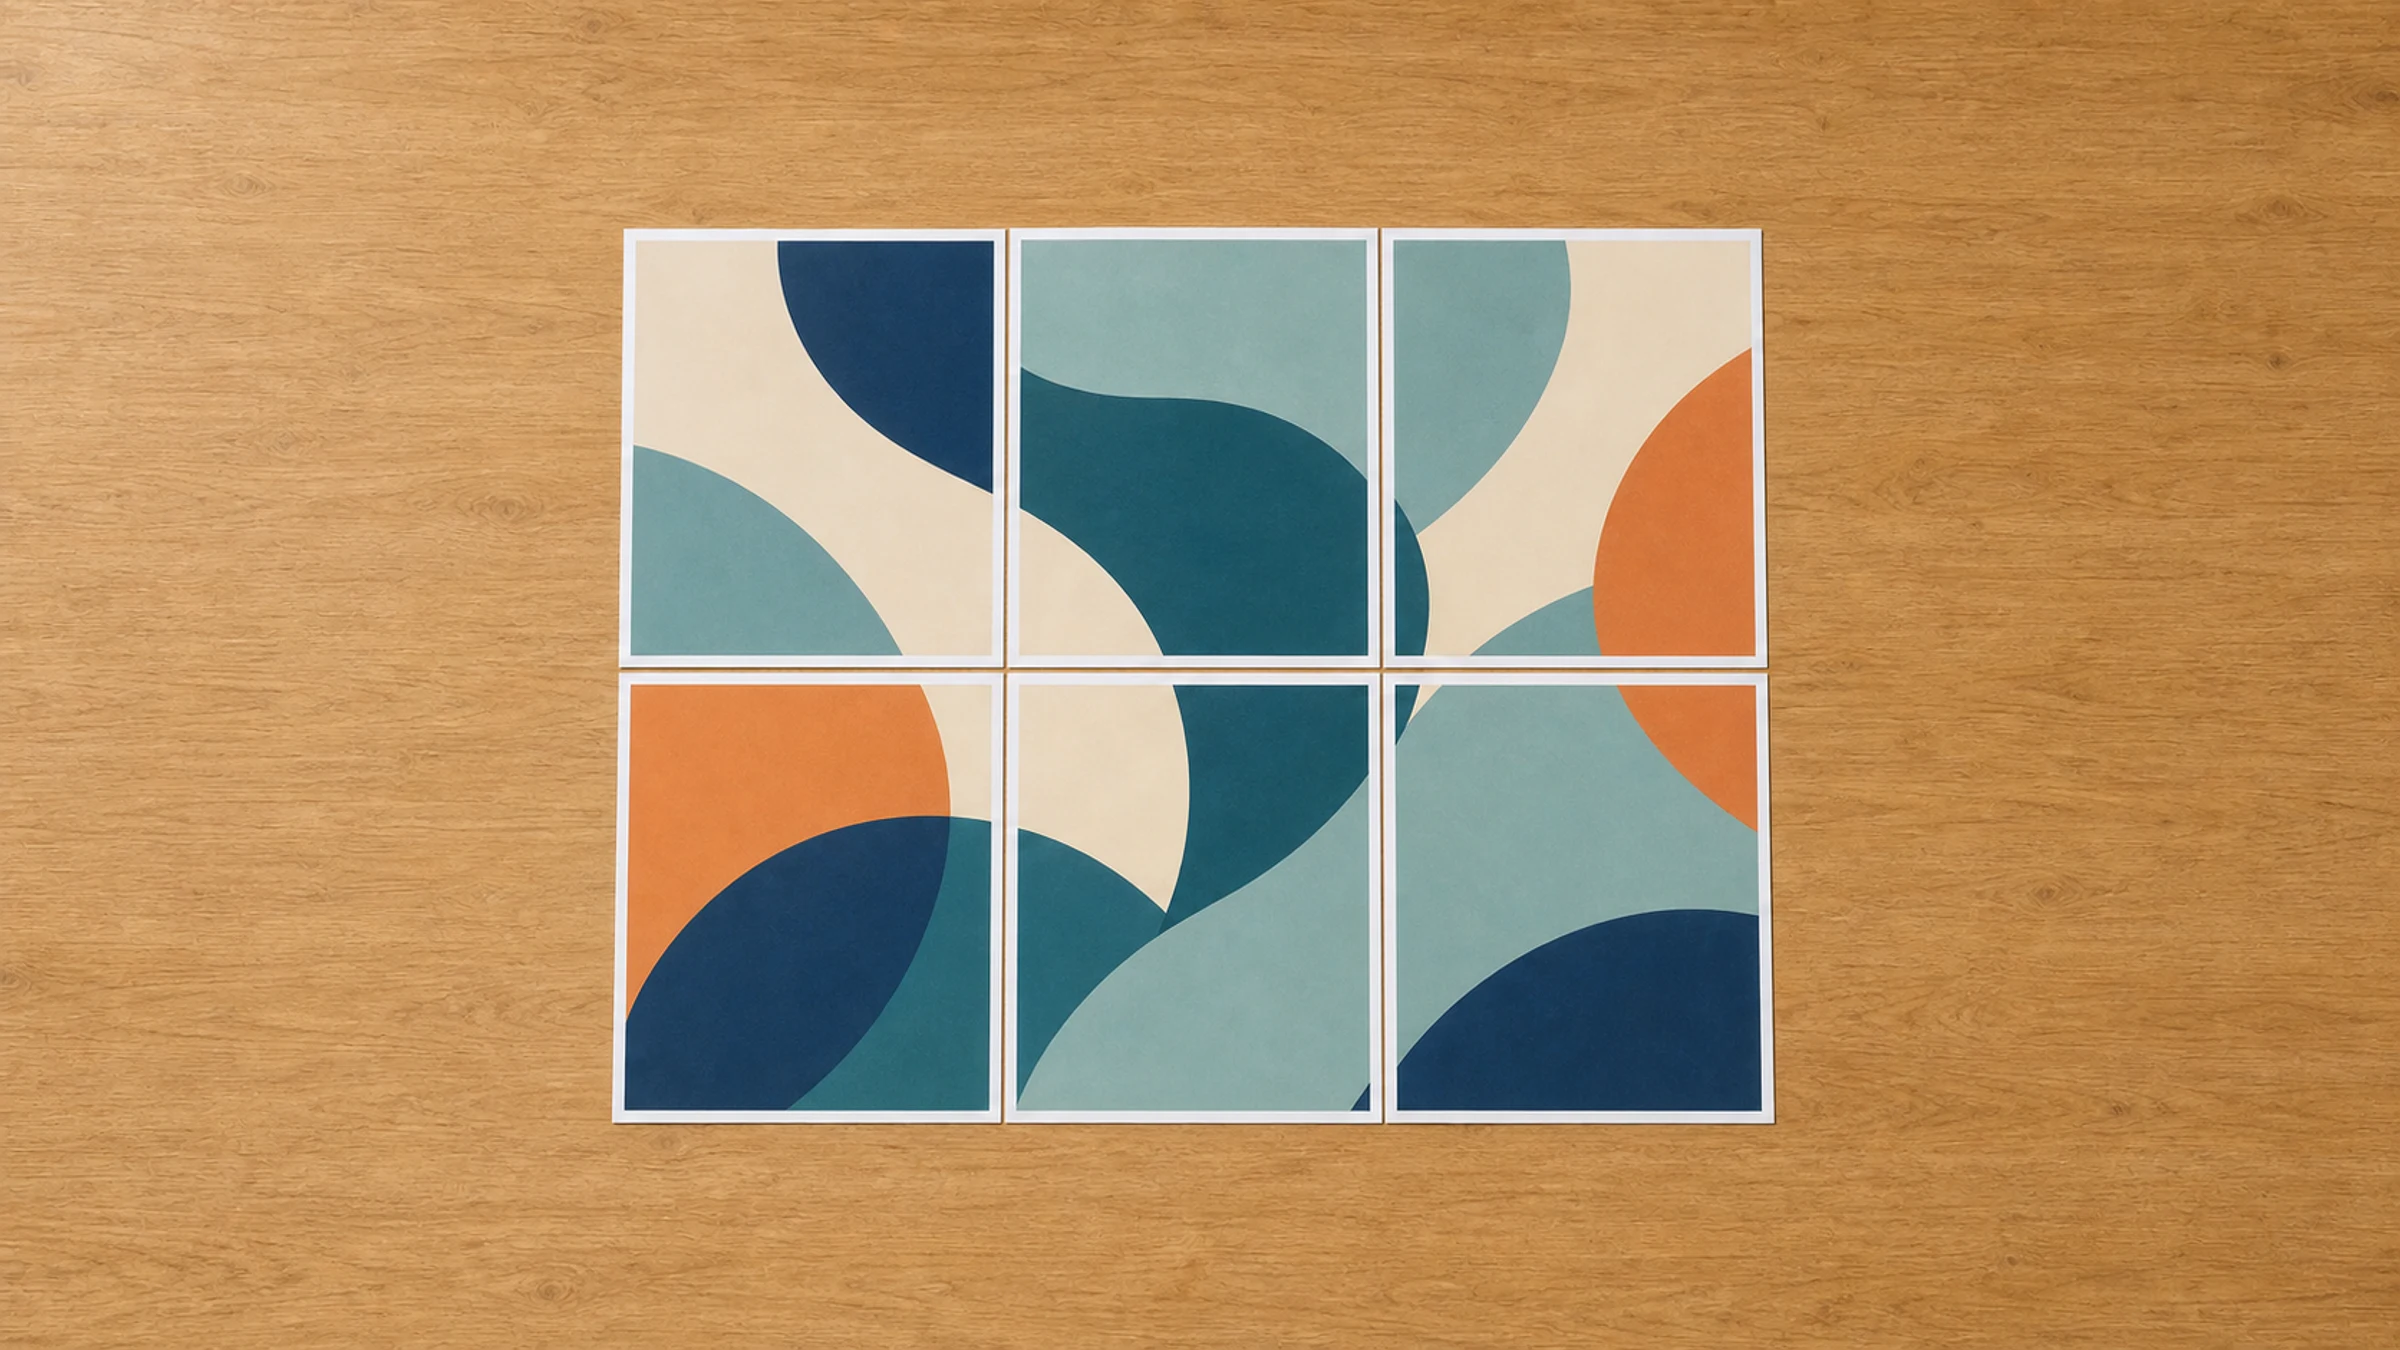
A normal A4 sheet is 210 x 297 mm. A larger PDF page can be divided into a grid of A4 pages.
One important detail: most home and office printers cannot print to the very edge of the paper. They leave an unprintable margin of about 3-5 mm around each sheet. This means you need to plan for overlap and trimming when assembling your poster.
Common A4 grid sizes and final poster dimensions:
| Final size goal | Approximate A4 grid | Notes |
|---|---|---|
| A3 landscape | 2 pages | Simple two-sheet assembly |
| A2 portrait | 4 pages | Common small poster size |
| A1 portrait | 8 pages | Needs careful trimming and alignment |
| Long banner | 3 or more pages in a row | Useful for signs and timelines |
The workflow is:
Open your PDF or image in a tiling tool.
Choose A4 as the output paper size.
Set the final size or scale.
Add overlap, crop marks, and page numbers.
Review the page grid.
Download the split PDF.
Print at Actual Size or 100%.
Trim and assemble the sheets.
What you'll need
Before you start, gather a few basic supplies:
A PDF file or image
An A4 printer
A ruler
A craft knife or scissors
A cutting mat or spare cardboard
Glue stick
Clear tape or masking tape for the back side
A large flat surface for assembly
A glue stick is usually cleaner than liquid glue and less likely to wrinkle paper. Tape is best used on the back side for reinforcement. Avoid front-side tape if glare or visible seams matter.
Step 1: Decide the final printed size
Before splitting the PDF, decide what correct size means for your project.
There are two common cases.
Case 1: The PDF must stay at actual size
This is important for:
Sewing patterns
Technical drawings
Templates
Measurement grids
Floor plans
Labels or cut guides
In this case, don't enlarge, shrink, or use fit-to-page settings unless you know the exact scale you need. The final tiled print should preserve the PDF's original dimensions.
If the PDF includes a test square, ruler, or scale bar, print one test page first and measure it with a real ruler.
Case 2: The PDF is a poster and can be enlarged
This is common for:
Photos
Classroom posters
Office signs
Event graphics
Presentation visuals
Here, you can choose the final width or height based on how large the poster should be on the wall. The exact scale is less critical, but you still need to print the tiled PDF at 100% after it has been generated.
Step 2: Split the PDF into A4 tiles
Use a tiled PDF tool such as Rasterbator.pics:
Load your PDF or image file into the tool. Because Rasterbator.pics processes files locally in your browser, the file preparation happens on your device.
Recommended tiling tool settings for A4 output:
| Setting | Recommended choice |
|---|---|
| Output paper size | A4 |
| Orientation | Portrait or landscape, whichever uses fewer pages |
| Scale | Actual size for plans/templates, custom size for posters |
| Overlap | 5-10 mm |
| Crop marks | On |
| Page numbers | On |
| Output | Download split PDF |
Before downloading, review the page grid preview. Check that the number of pages, orientation, and final size look right. Then download the split PDF and save it with a clear name.
Useful file names include:
classroom-map-A4-tiled-100-percent.pdf
pattern-actual-size-A4-overlap-10mm.pdf
Step 3: Choose overlap, crop marks, and page numbers
These small details make the assembly much easier.
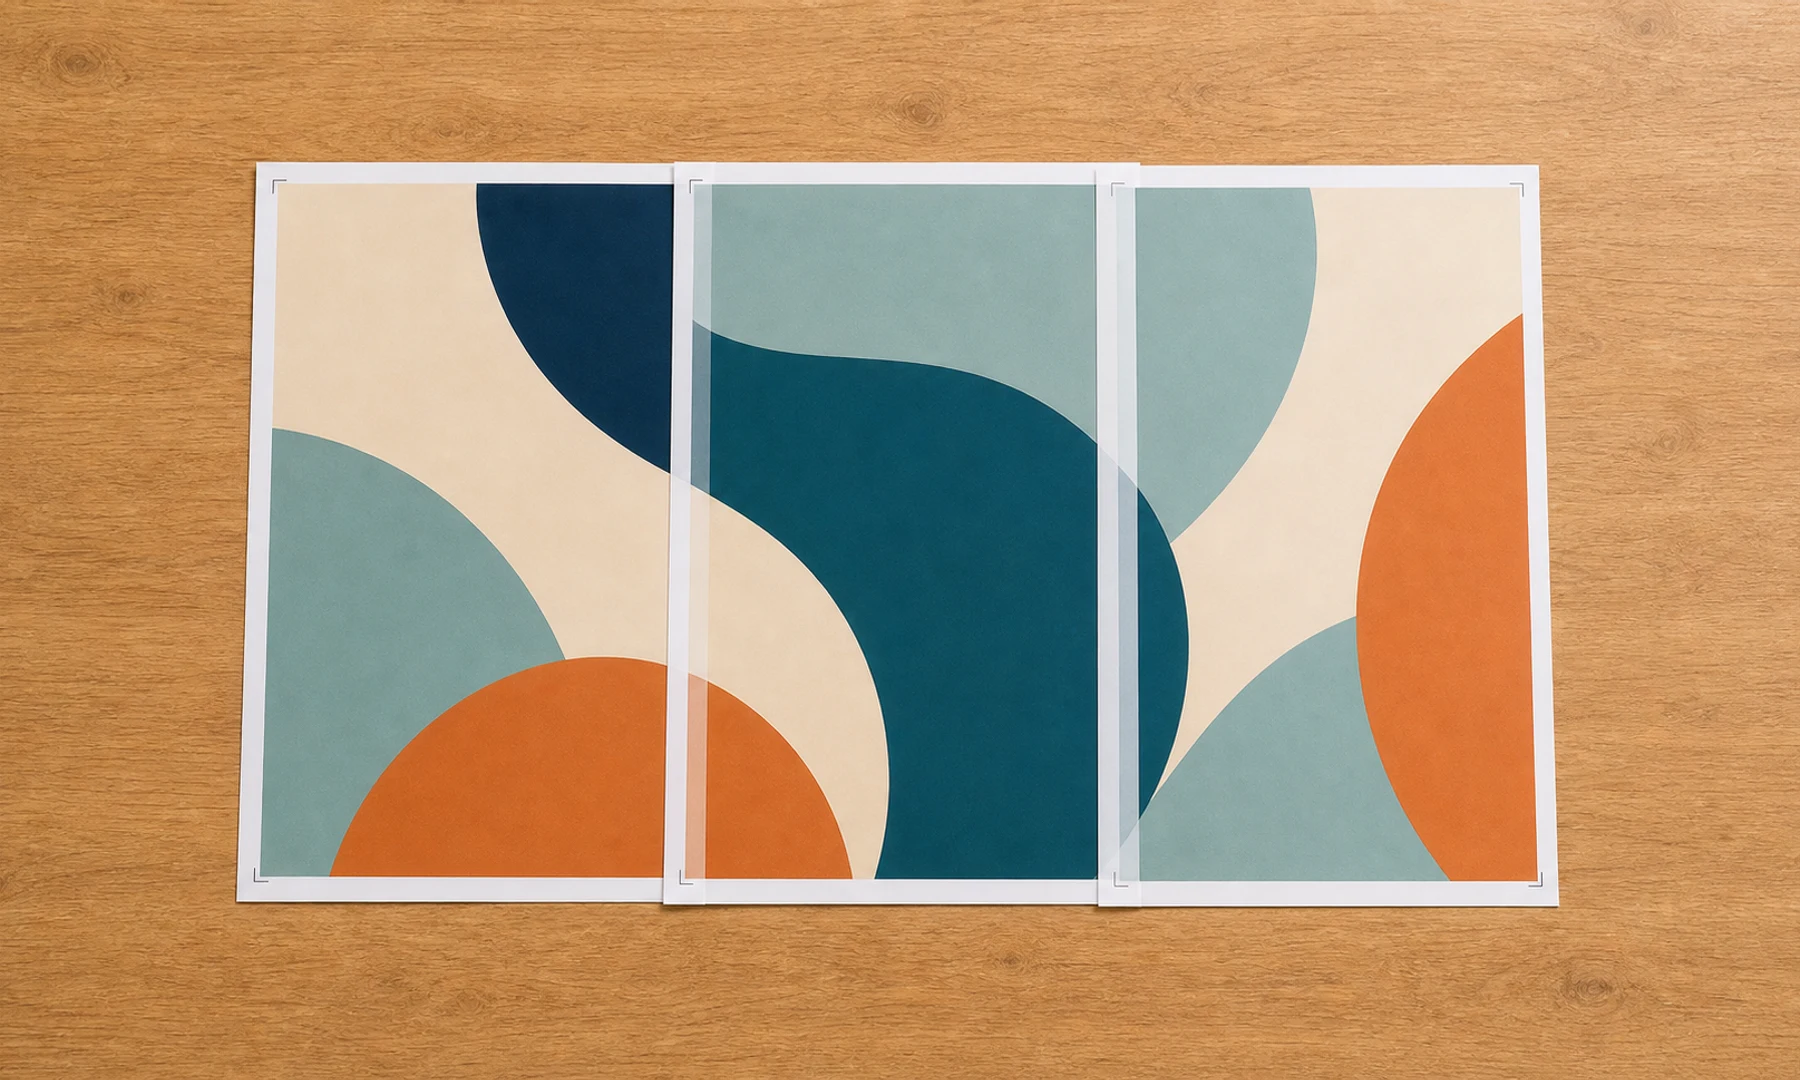
Overlap
Overlap means each tile repeats a small strip of the neighboring tile. This gives you extra printed content for alignment.
A good overlap is usually:
5 mm for small posters and accurate printers
10 mm for larger posters or easier assembly
Overlap also helps compensate for the 3-5 mm unprintable margins on many home and office printers. Without overlap, content near page edges may be missing or difficult to align.
Crop marks
Crop marks show where to cut the sheet. They are useful when you need clean joins.
You don't always need to trim every edge. A common method is:
Keep one page untrimmed as a base.
Trim only the overlapping edge of the neighboring page.
Glue the trimmed page over the untrimmed margin.
Trim only the necessary margins to allow the overlap to align with the printed content. This is faster and more forgiving than trimming all four sides of every sheet.
Page numbers
Page numbers help you assemble the poster in the correct order.
For large tiled PDFs, page numbers are strongly recommended. Lay the sheets on the floor or a large table before gluing anything.
Step 4: Print the tiled PDF at actual size
This is the most important part.
Golden rule: Print at Actual Size or 100%. Never use Fit, Fit to page, Shrink to printable area, or Scale to fit.
When you print the split PDF, look for settings such as:
Actual Size
100%
No scaling
Avoid settings such as:
Fit
Fit to page
Shrink to printable area
Scale to fit
Fill entire paper
The exact wording varies by printer and software.
Scaling settings can slightly resize each A4 tile. Even a small scaling change can make the final assembled poster wrong, especially for plans, diagrams, sewing patterns, or multi-page grids.
Step 5: Verify with a test page
Before printing all pages, print page 1 and verify the scale:
Measure a known dimension with a ruler.
Check any test square, scale bar, or ruler printed on the page.
Confirm the measurement matches the expected size.
For posters where exact scale is less critical, a visual check is enough. For technical drawings, sewing patterns, or templates, this test is essential.
Printing from Adobe Acrobat Reader
Adobe Acrobat Reader has a built-in Poster mode that can tile a PDF directly.
To use it:
Open the PDF in Adobe Acrobat Reader.
Choose File > Print.
Select Poster under Page Sizing & Handling.
Set the tile scale.
Set overlap.
Enable cut marks and labels if needed.
Print a test page first.
Adobe Acrobat Reader is useful if you want to skip the separate tiling step and print directly from the PDF.
However, creating a separate split PDF first can be more convenient when:
You want to check the page layout before printing.
You need to send the tiled PDF to someone else.
You want to print later from another computer.
Your browser or printer dialog doesn't offer reliable poster mode.
You want crop marks, page numbers, and overlap in a prepared output file.
A practical approach: generate a tiled PDF first using Rasterbator.pics, then print the tiled PDF from Adobe Acrobat Reader at Actual Size.
Printing from a browser
You can also print a downloaded tiled PDF from Chrome, Edge, Safari, or Firefox. Browser print dialogs vary, so check the preview carefully.
Look for settings such as:
Scale: 100
Paper size: A4
Margins: default or none, depending on your output
Fit to page: off
Headers and footers: off, if the browser offers that option
If the browser preview looks wrong, use Adobe Acrobat Reader instead. It usually gives clearer control over PDF page scaling.
Example: Printing an A2 poster on A4 sheets
Suppose you have a PDF poster and want something close to A2 size.
A2 is 420 x 594 mm. A4 is 210 x 297 mm. So A2 is exactly four A4 sheets in a 2 x 2 grid, before accounting for margins and overlap.
Here's a practical example: an A2 poster divides neatly into a 2 x 2 grid of A4 sheets.
| Setting | Value |
|---|---|
| Output paper | A4 |
| Final poster | A2 |
| Grid | 2 x 2 sheets |
| Overlap | 5-10 mm |
| Crop marks | On |
| Page numbers | On |
| Print scale | Actual Size / 100% |
After printing, lay out the four sheets in order. Trim the right edge of the left sheets or the left edge of the right sheets, then align the image using the overlap. Apply glue stick to the overlapping paper area and press firmly. If needed, reinforce the join with tape on the back side.
How to assemble the pages neatly
Assembly quality matters as much as print quality.
You will need:
A ruler
A sharp craft knife or scissors
A cutting mat or spare cardboard
Glue stick
Clear tape or masking tape for the back
A large flat surface
Recommended assembly method:
Let the pages dry for a few minutes if you are using an inkjet printer.
Arrange all pages in order using the page numbers.
Check the full image before cutting.
Trim only the edges that need to overlap.
Align the printed image using the overlap, not just the paper edges.
Apply glue stick to the overlapping paper area and press firmly.
Reinforce joins with clear tape or masking tape on the back side, not the front.
Work row by row, then join the rows together.
A glue stick is cleaner and less likely to wrinkle paper. Back-side tape adds strength without making the front look shiny. Avoid front-side tape for posters, photos, or presentation pieces where glare and visible seams matter.
Checklist before you hit Print
Before printing all pages, check this list:
The output paper size is A4.
The tiled PDF has the expected number of pages.
The page grid preview looks correct.
The final size or scale is correct.
Overlap is enabled, usually 5-10 mm.
Crop marks are enabled if you plan to trim.
Page numbers are enabled for multi-page posters.
Printer scaling is set to Actual Size or 100%.
Fit-to-page and shrink-to-printable-area settings are turned off.
The printer is loaded with the correct paper orientation.
You have printed one test page for scale-critical PDFs.
Any test square, ruler, or scale bar measures correctly.
You have accounted for a 3-5 mm unprintable margin by using overlap.
Troubleshooting common scaling problems
The final poster is slightly too small
Most likely cause: the print dialog used Fit or Shrink to printable area.
Fix:
Reprint at Actual Size or 100%.
Check that the tiled PDF page size is A4.
If that fails, print from Adobe Acrobat Reader instead.
The edges are cut off
Most printers cannot print to the very edge of A4 paper. A 3-5 mm unprintable margin is normal.
Fix:
Use overlap.
Enable crop marks.
Avoid placing critical content at the extreme outer edge.
Check that the tiled PDF was created for A4 paper.
Test one page before printing the full set.
Very few consumer printers support true borderless printing for all paper sizes. Even if available, test scale carefully, because borderless modes can introduce slight scaling distortion.
The pages don't line up
Possible causes:
Different pages printed with different scaling.
Paper fed slightly crooked.
No overlap was used.
Trimming followed paper edges instead of printed marks.
Fix:
Print all pages in one batch with the same settings.
Don't pause, cancel, or change settings between pages.
Use 5-10 mm overlap.
Align the printed artwork, not the sheet edges.
Trim with a ruler and sharp blade.
The PDF prints on fewer pages than expected
The software may be scaling the PDF down to fit.
Fix:
Check the final size in the tiling tool.
Confirm the grid size before downloading.
In the print dialog, choose Actual Size or 100%.
The PDF prints on more pages than expected
The selected final size may be larger than intended, or the orientation may be inefficient.
Fix:
Try switching A4 orientation between portrait and landscape.
Check the final width and height.
Reduce overlap if it is unnecessarily large.
Confirm that you are not enlarging the PDF twice.
Text or linework looks blurry
If the original PDF contains low-resolution images, tiling cannot add detail. Enlarging a small raster image will make it softer.
Fix:
Use the highest-quality original PDF available.
Avoid extreme enlargement for screenshots or compressed images.
For technical drawings, use vector PDFs when possible.
Practical tips for offices, schools, and drawings
For office signs:
Use heavier paper if available.
Use a simple 2 x 2 or 3 x 3 grid.
Add page numbers so someone else can assemble it quickly.
For classroom posters:
Laminate the finished poster or reinforce it from the back if it will be reused.
Use bold images and large text.
Avoid tiny text across page joins.
For drawings and templates:
Always print a test page first.
Measure a known dimension.
Don't use fit-to-page settings.
Keep the original PDF and the tiled PDF clearly named.
FAQ
Can I print a large PDF on A4 pages without a plotter?
Yes. Split the PDF into A4 tiles, download the tiled PDF, and print it at Actual Size or 100%. Then trim and assemble the sheets.
What is tiled PDF printing?
Tiled PDF printing means dividing one large PDF page into multiple smaller pages. Each printed sheet contains one tile of the full image or document.
How much overlap should I use?
Use 5-10 mm overlap for most projects. Larger posters are easier to assemble with 10 mm overlap. Overlap also helps compensate for the 3-5 mm unprintable margins on many printers.
Should I use crop marks?
Yes, if you plan to trim the sheets. Crop marks make cutting and alignment much easier.
Why should I print at Actual Size or 100%?
Because fit-to-page settings can resize the tiles. If each page is scaled, the assembled poster may be too small, too large, or inaccurate.
Can Adobe Acrobat Reader print a PDF as a poster?
Yes. Adobe Acrobat Reader includes a Poster option in the print dialog. It is useful for direct tiled printing. If you want a separate prepared file, you can create a split PDF first and then print that file at 100%.
Why are parts of my page missing near the edges?
Most printers have an unprintable margin, often about 3-5 mm. Use overlap and crop marks, and avoid placing critical details right at the edge. Very few consumer printers support true borderless printing for all paper sizes, and even when available, borderless modes can introduce slight scaling distortion.
What file formats does Rasterbator.pics accept?
Rasterbator.pics is designed for PDFs and common image formats such as JPG and PNG. Check the tool for current supported formats and limits.
Does Rasterbator.pics upload my PDF for processing?
Rasterbator.pics processes your image or PDF locally in your browser. The preparation happens on your device.
Is this suitable for technical drawings?
It can be, but you must be careful. Print at Actual Size, measure a known dimension, and test one page first. For official or high-precision drawings, use professional large-format printing.
Download a split PDF and print on A4
To create a tiled PDF for A4 printing, open the tool, choose your final size, enable overlap and crop marks, review the page grid, then download the split PDF:
Print the downloaded file at Actual Size or 100%, assemble the sheets with trimming, glue stick, and back-side tape, and you can make a large poster without a plotter.
Try Rasterbator.pics
Use Rasterbator.pics to test the article advice with your own image, page size, overlap, margins, and tiled PDF export.
Try Rasterbator.pics