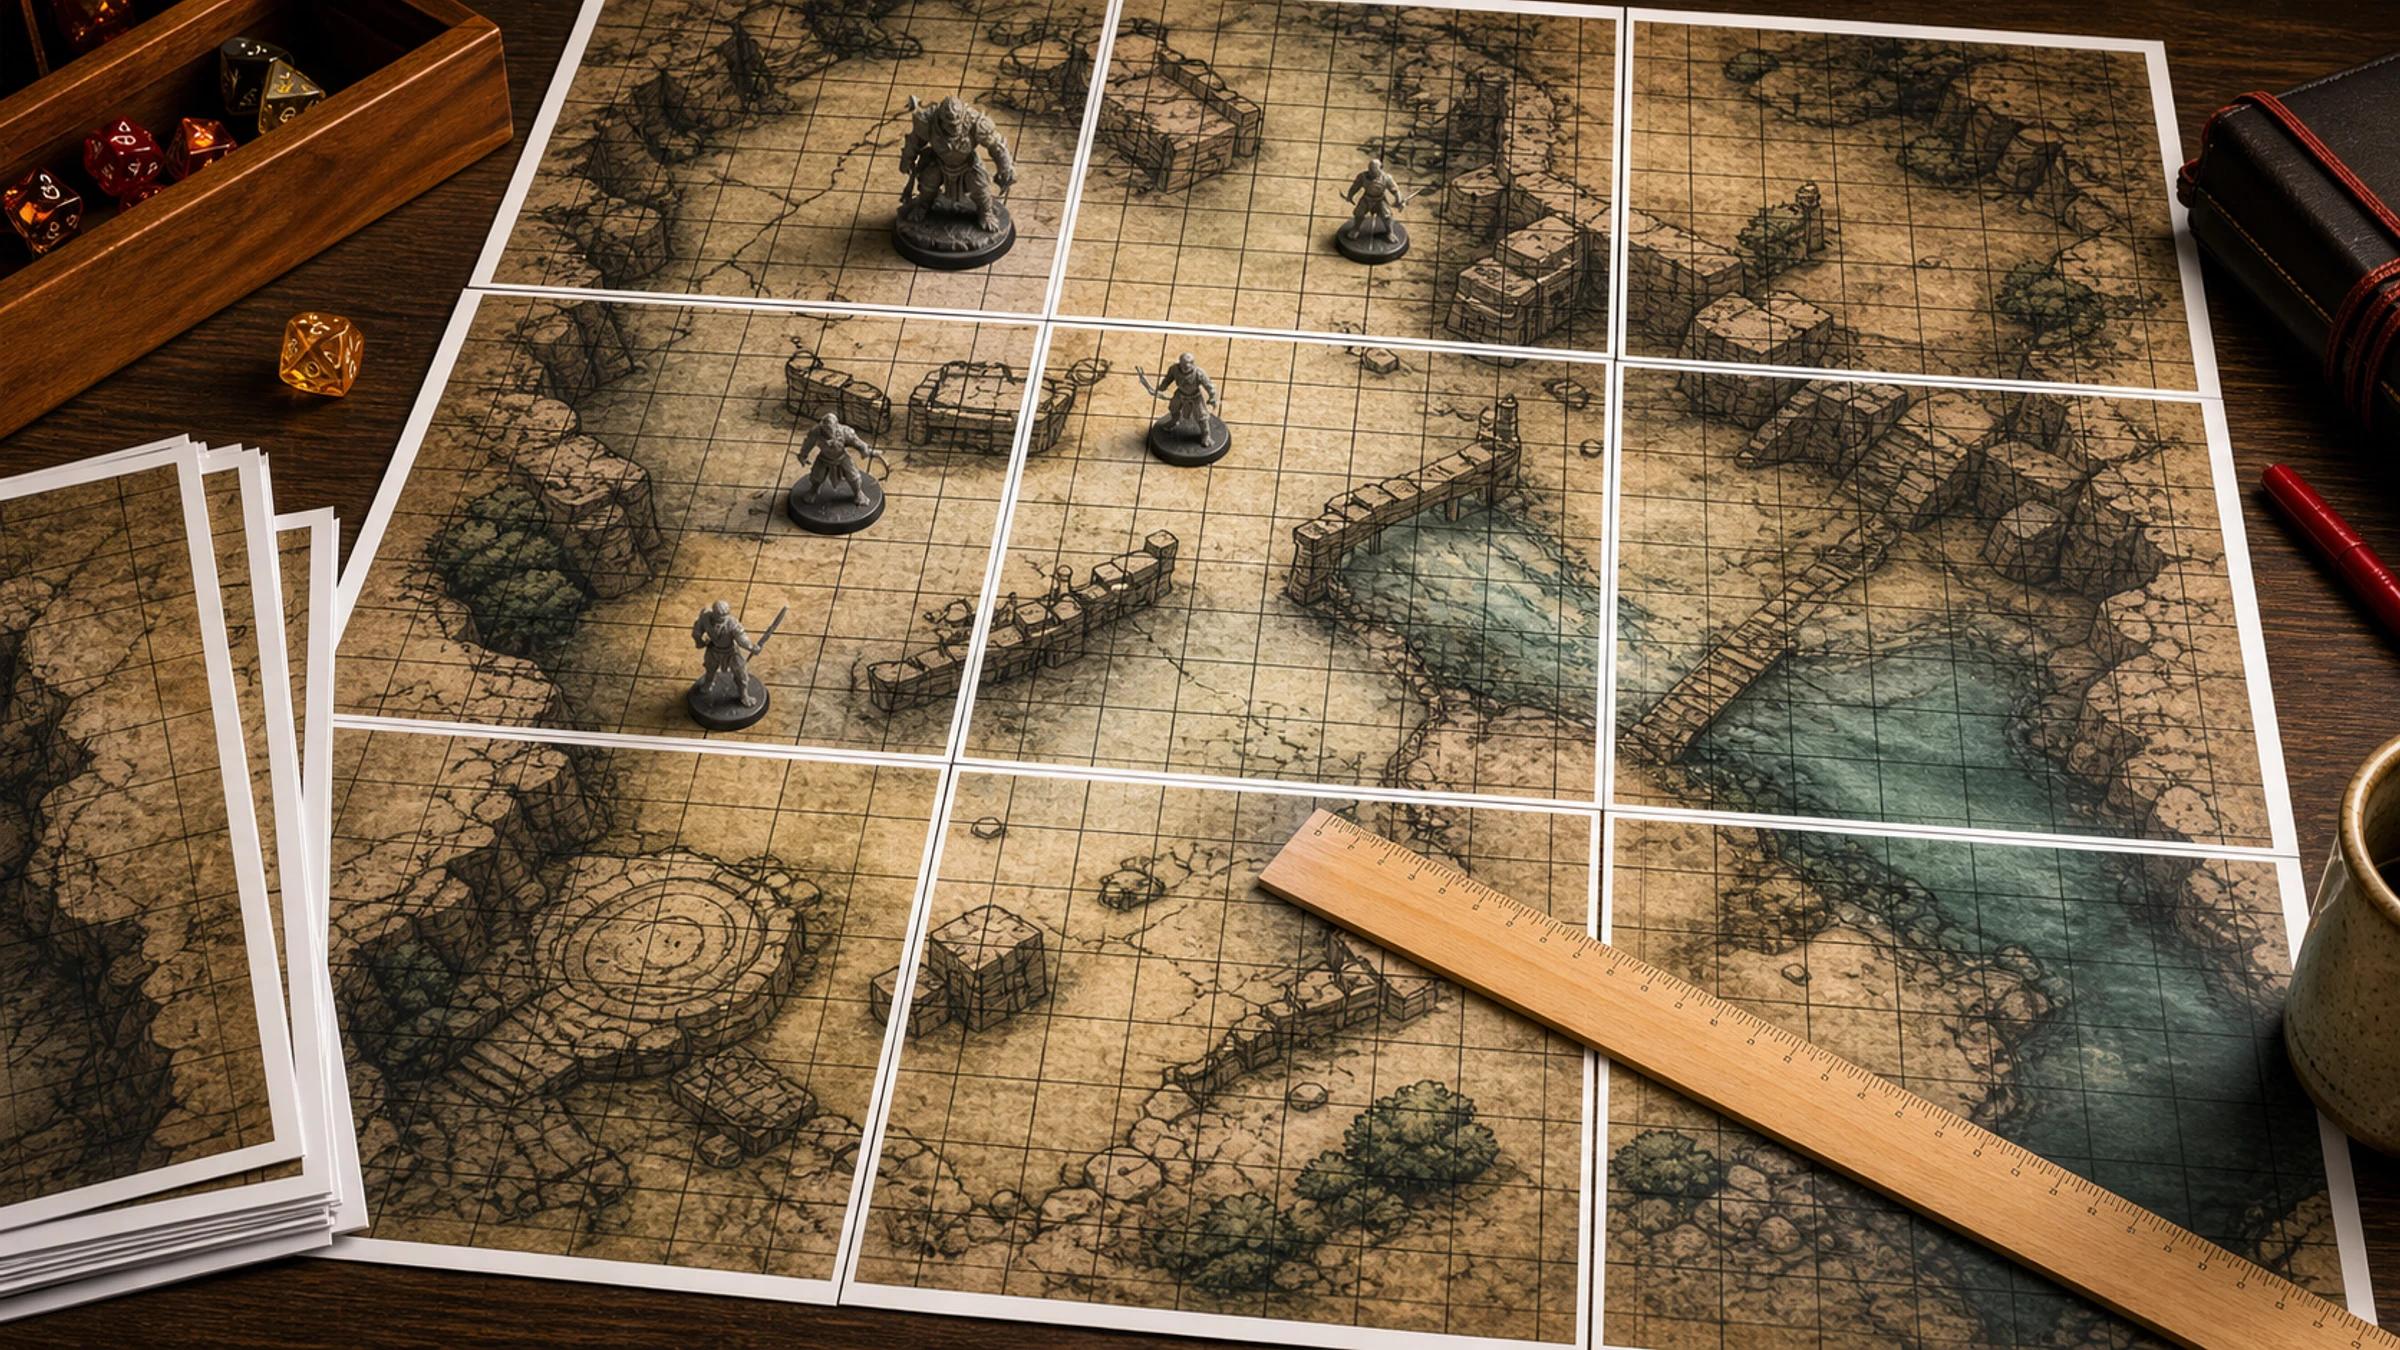
A Dungeons & Dragons battle map only works well when the grid stays true to the table. For most miniatures play, that means one square equals one inch. If the printer quietly shrinks the file to fit the page, doors, corridors, movement, spell areas, and creature bases stop lining up.
The reliable workflow is simple: prepare the map at the right physical size, split it across normal printer pages, print without scaling, measure a test grid, then assemble the sheets.
Rasterbator.pics prepares tiled poster PDFs locally in your browser, so your battle map image is handled on your device while you choose the final size and paper layout.
The one-inch grid rule
Most D&D battle maps use this scale:
| Game distance | Tabletop distance |
|---|---|
| 5 feet | 1 inch |
| 10 feet | 2 inches |
| 30 feet | 6 inches |
| 60 feet | 12 inches |
So a 24 by 18 square map should print about 24 by 18 inches. A 30 by 40 square map should print about 30 by 40 inches. The grid count becomes the printed size in inches.
This is why ordinary "fit to page" printing is usually wrong for battle maps. It may make the whole image visible, but it changes the square size.
Check the map file first
Before printing, identify what kind of file you have:
a ready-to-print PDF
a JPG or PNG from a map maker, marketplace, or virtual tabletop source
an export from software such as DungeonDraft, Inkarnate, Wonderdraft, Photoshop, or GIMP
a cropped screenshot that may not have reliable scale information
For image files, the useful question is: how many pixels make one grid square?
Common battle map resolutions include:
| Pixels per square | Common use |
|---|---|
| 70 px | Virtual tabletop maps |
| 100 px | Common digital and print maps |
| 140 px | Higher-resolution tabletop maps |
| 200 px | Detailed printable maps |
| 300 px | High-quality print maps |
If one grid square is 100 pixels wide and you want it to print as one inch, the image should print at 100 pixels per inch. If one square is 200 pixels wide, print at 200 pixels per inch.
Work out the final print size
Count the map grid squares, then convert the count directly to inches.
| Grid size | Final printed size |
|---|---|
| 10 x 10 squares | 10 x 10 in |
| 20 x 20 squares | 20 x 20 in |
| 24 x 18 squares | 24 x 18 in |
| 30 x 40 squares | 30 x 40 in |
If the map image is 2400 x 1800 pixels and the grid is 100 pixels per square:
2400 pixels / 100 pixels per square = 24 squares wide.
1800 pixels / 100 pixels per square = 18 squares tall.
The final printed map should be 24 x 18 inches.
The print resolution should be 100 pixels per inch.
If the map has no visible grid, decide whether you want to add one before printing or use the map as a gridless play surface.
Create a tiled PDF
A normal home printer cannot print a 24 x 18 inch map on one sheet. It has to split the image across A4 or Letter pages.
Use Rasterbator.pics when your source is an image file:
Open Rasterbator.pics.
Upload the battle map image.
Choose your paper size, usually A4 or Letter.
Set the final map size from the grid count, such as 24 x 18 inches.
Leave room for normal printer margins.
Use a small overlap if you want easier assembly.
Generate the tiled PDF.
Practical settings:
| Setting | Recommendation |
|---|---|
| Final size | Match the grid count in inches |
| Paper | A4 or Letter, depending on your printer |
| Orientation | Choose the layout that uses fewer sheets |
| Margins | Allow for the printer's unprintable area |
| Overlap | 5-10 mm is useful for alignment |
| Print scale | Actual Size, 100%, or No scaling |
Remember the printer margins
Most home inkjet and laser printers leave an unprintable border around the paper. A common range is 3-5 mm on each side, though some printers need more.
That white edge is normal. It does not mean the map failed.
For battle maps, margins matter because page edges often cross rooms, corridors, terrain, or grid lines. To avoid missing map content:
use a tiled layout that accounts for printer margins
add overlap between neighboring pages
trim only the edges that need trimming
keep important labels away from page boundaries when possible
avoid borderless mode unless you have tested it
Borderless printing can look tempting, but many borderless modes enlarge the image slightly. That can ruin the one-inch grid.
Print a scale test first
Before printing the full map, print one tile that includes several grid squares. Measure it with a ruler.
Check more than one square:
| Measurement | Correct result |
|---|---|
| 1 square | 1 inch |
| 4 squares | 4 inches |
| 6 squares | 6 inches |
| 10 squares | 10 inches |
Measuring four or six squares is more reliable than measuring only one. A tiny error is easier to see over a longer distance.
If four squares measure 3.8 inches, the map printed too small. If four squares measure 4.2 inches, it printed too large. Stop and fix the print settings before wasting the full page set.
Print without scaling
This is the most important step.
In the print dialog, choose one of these settings:
Actual Size
100%
No scaling
Scale: 100%
Avoid:
Fit
Fit to page
Shrink oversized pages
Scale to printable area
Borderless auto enlarge
Fill entire paper
Different printer drivers use different words, but the goal is always the same: the printer must not resize the map.
Before the full run, confirm:
the paper size is correct
the orientation is correct
the tiled PDF is selected
the scale is Actual Size or 100%
borderless enlargement is off
enough paper is loaded
ink or toner is sufficient
For a large map, print one row first and check that neighboring pages align before printing every remaining tile.
Trim and assemble the sheets
Let inkjet pages dry before trimming. Then use a metal ruler, craft knife, cutting mat, or scissors.
A simple assembly workflow:
Lay out all printed sheets in order.
Check that the map rows and columns are complete.
Trim one joining edge at a time.
Align using several grid lines, not just one corner.
Tape the seam from the back or glue the overlap lightly.
Join each row first.
Join the rows into the full map.
Back-side tape usually gives cleaner seams than front-side tape. A glue stick is quick for one-shots, but too much glue can wrinkle normal printer paper.
Verify the assembled map
After assembly, measure the grid again:
one square
five squares
ten squares
a horizontal line
a vertical line
The whole map does not need museum-level perfection, but it should be playable. If ten squares measure 10 inches, your miniatures and spell templates will behave as expected. If ten squares measure 9.5 or 10.5 inches, the scale is visibly off.
Common problems and fixes
| Problem | Likely cause | Fix |
|---|---|---|
| Squares are too small | Fit to page was enabled | Reprint at Actual Size or 100% |
| Squares are too large | Borderless enlargement or wrong scale | Disable enlargement and set 100% |
| Grid lines do not align | Trim or overlap error | Align using several grid lines |
| Map edges are missing | Printer margins were ignored | Use margins or overlap in the tiled layout |
| PDF prints differently from preview | Printer driver scaling | Check both app settings and printer properties |
| Ink smears | Pages were handled too soon | Let ink dry before trimming |
| Paper wrinkles | Too much glue | Use less glue or back-side tape |
Should you print with or without the grid?
If the map already has a clear grid, print it as-is and verify the square size.
If the map has no grid, you can:
add a one-inch grid before printing
print without a grid and use a transparent overlay
use rulers, templates, or measuring sticks during play
For traditional miniatures, the printed grid is usually easiest. For scenic play, gridless maps can look cleaner, but movement needs more table judgment.
FAQ
What size should a D&D battle map square be?
For standard miniatures, one square should print as 1 inch by 1 inch. In the game, that usually represents 5 feet.
Can I print a D&D battle map on A4 paper?
Yes. Use tiled printing to split the map across multiple A4 sheets. Print at Actual Size or 100%, then measure the grid before assembling the full map.
Can I print a D&D battle map on Letter paper?
Yes. Letter paper works the same way as A4 for this purpose. Choose Letter in the print settings and avoid automatic scaling.
Why are my one-inch squares not one inch after printing?
The print dialog probably used Fit, Shrink, Scale to printable area, or another resizing option. Reprint with Actual Size, 100%, or No scaling.
How much overlap should I use?
Around 5-10 mm is practical for many home printers. It gives you extra printed area for aligning grid lines and helps cover normal printer margins.
Should I use glue or tape?
Use a glue stick for quick disposable maps. Use tape on the back side if you want cleaner seams or a map you can fold and reuse.
Final check
The print quality does not have to be perfect, but the scale does. Prepare the file so one grid square equals one inch, create a tiled PDF, print at Actual Size or 100%, and measure a test page before printing the full map.
If the ruler confirms the grid, your miniatures, movement, rooms, and spell areas will make sense at the table.
Try Rasterbator.pics
Use Rasterbator.pics to test the article advice with your own image, page size, overlap, margins, and tiled PDF export.
Try Rasterbator.pics